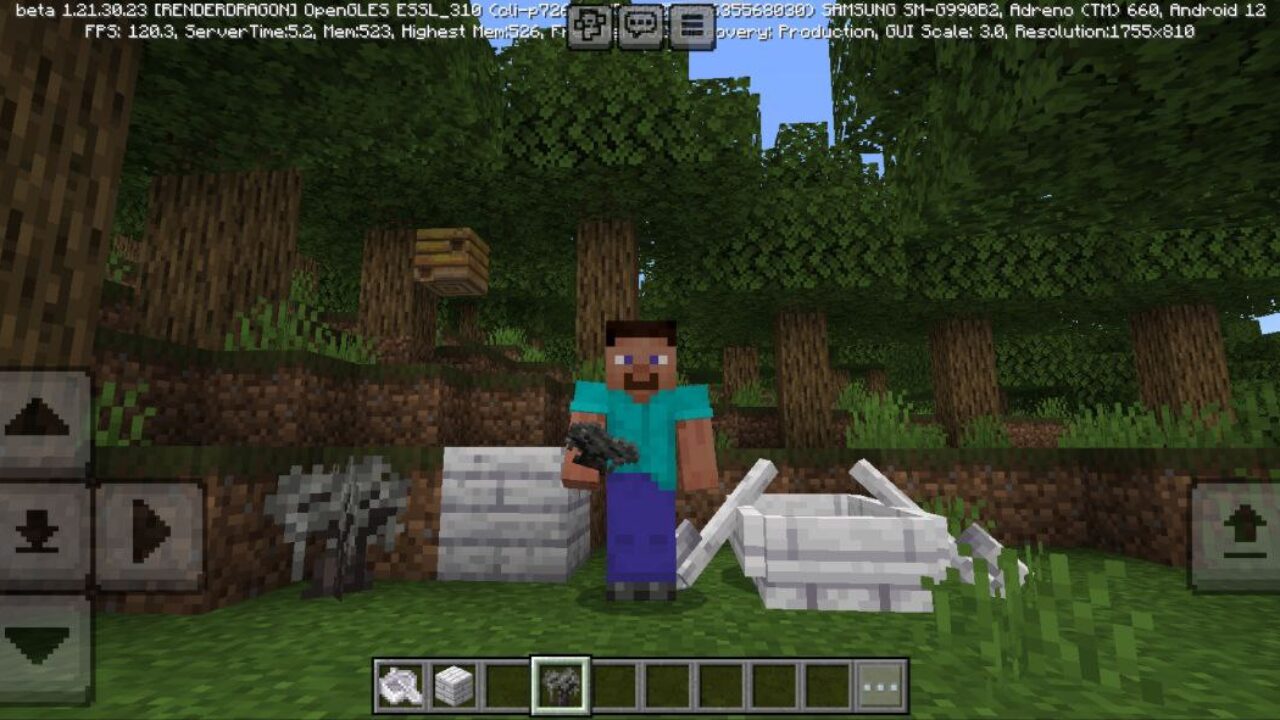
How to install Textures for Minecraft PE
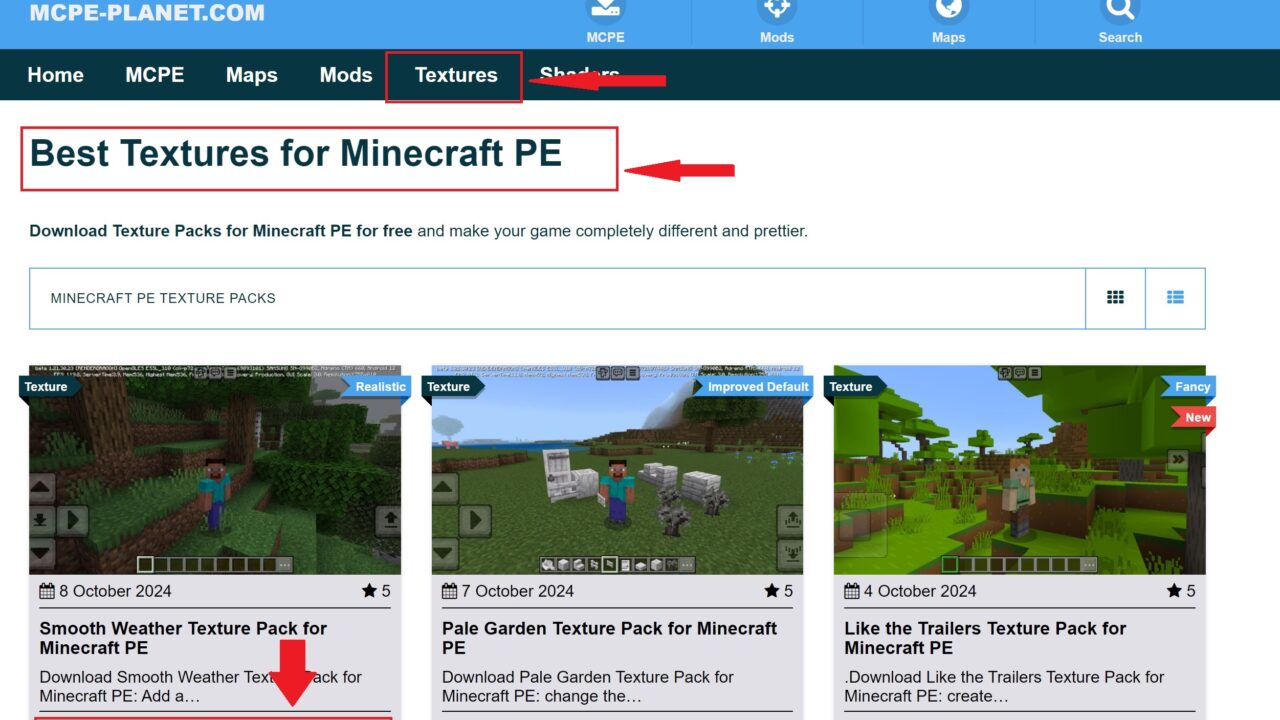
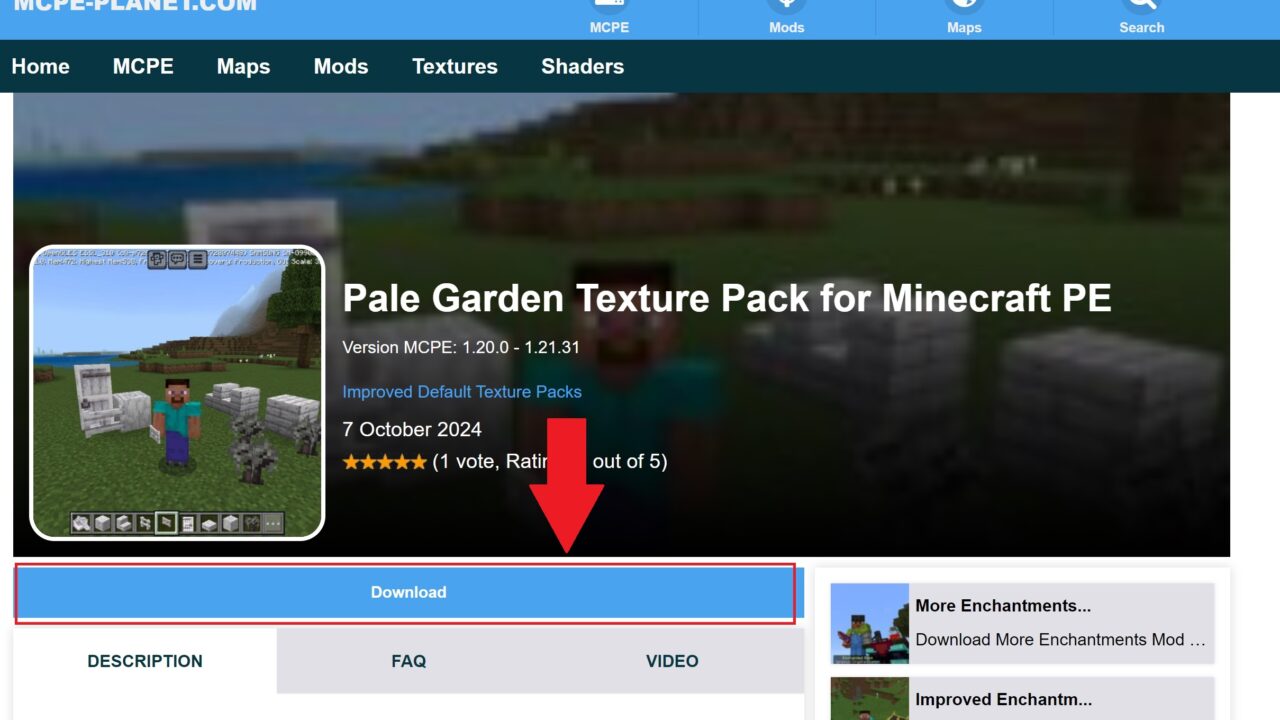
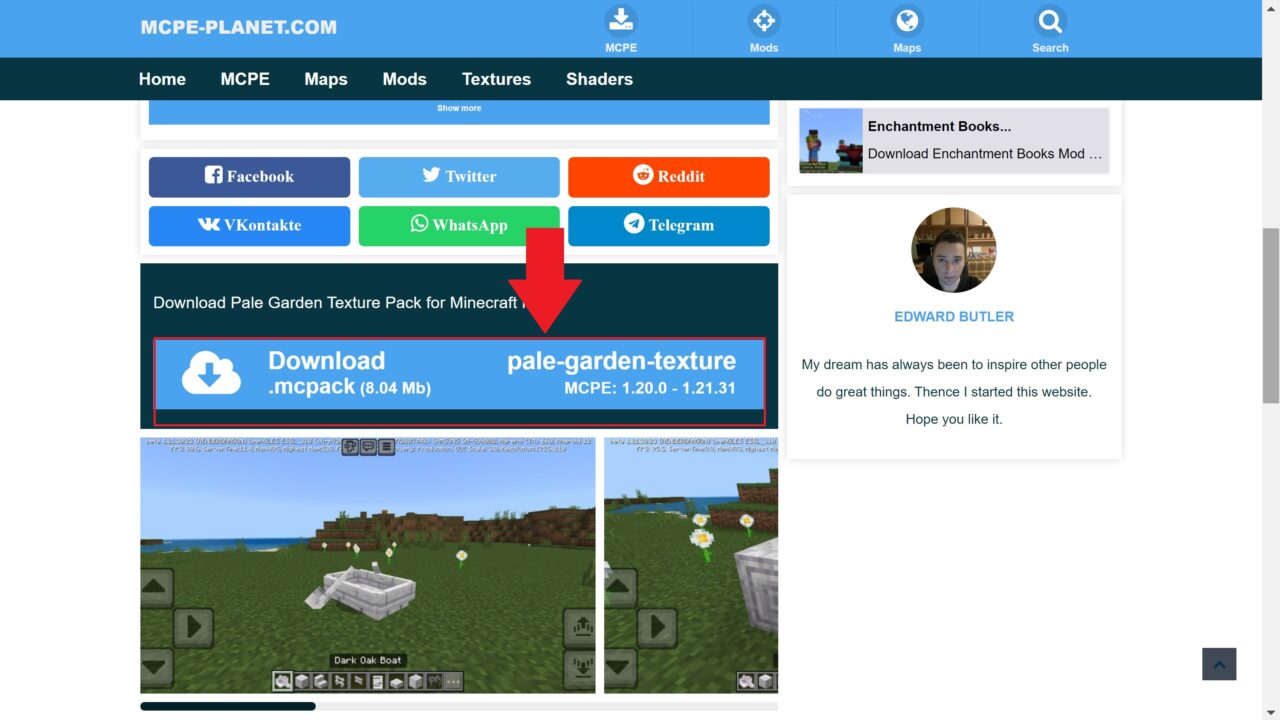
Tutorial for install Textures (.mcpack)")
")
")
")
")
")
")
")
")
")
- What file formats exist for Textures for Minecraft PE?
- Do I need to pay for downloading files?
- Is there any way to process the file before installation?


My dream has always been to inspire other people do great things. Thence I started this website. Hope you like it.
How to install Te...
How to install Templates for Minecraft PE: get ...
How to install Ma...
How to install Maps for Minecraft PE: Visit the...
How to install Sh...
How to install Shaders for Minecraft PE: Transf...
How to install Te...
How to install Textures for Minecraft PE: use v...
0 Comments